Friday, January 30, 2015

Corn Pudding


For many years the traditional corn dish we have always served for holidays is "Scalloped Corn". It's an old family recipe that includes crushed saltine crackers and was always on Grandma Betty's table. But almost every recipe can be improved upon, and about ten years ago Mom did just that.

Enter "Corn Pudding", our NEW favorite corn dish. It uses both whole kernel corn and creamed corn, sour cream, corn bread mix and a whole stick of butter. It's a very moist, rich dish, and could almost be served for dessert.

Serving this side dish with ham is a must, whether it's for a holiday, or any day of the week. 

A ham is such an easy thing to heat up in your oven, and leftover ham sandwiches can't be beat. Especially if they have a side of "Corn Pudding" beside them.


Corn Pudding                                                                                                  Printable Version

1/2 c. butter, softened
1/2 c. sugar
2 large eggs
1 c. sour cream
1 8 1/2 oz. package corn muffin mix (this is the size of the Jiffy Brand, but we also use the Krusteaz brand, and just measure out the correct amount, saving the remaining mix for a batch of cornbread).
1/2 c. milk
1 can whole kernel corn, drained
1 can cream style corn

Preheat your oven to 350 degrees.  Spray a 3 quart glass baking dish with cooking spray.

Cream together the butter and sugar. Add the eggs one at a time, beating well after each addition. Mix in the sour cream, then add the corn muffin mix and milk. Fold in both cans of corn. Pour the batter into the greased baking dish and level with a rubber scraper to even out the top. 

Bake uncovered for 45-60 minutes until golden brown.  Keep checking it after the first 45 minutes and take it out when there is just a bit of jiggle left in the middle of the pudding.

Wednesday, January 28, 2015

Grilled Cheeses

A grilled cheese sandwich has always been the epitome of comfort food to me. When my mom would babysit Riley when he was little, she would always make him one, on special Artisan bread that Dad picked up at a local bakery that was just perfect for grilling. And of course there would always be Campbell's Tomato Soup to dip it in. Inevitably it would be so yummy that he would request the same thing for dinner that night, and most of the time I would oblige. Once someone brings up "grilled cheeses", it's hard to pass up the opportunity to eat one.

You could use any kind of bread and any kind of cheese for a grilled cheese sandwich, but it's best to have a bread that will turn crunchy when it's toasted just right, and cheese that will be gooey and messy when melted.

The Kid has this figured out, as witnessed by this four layer monstrosity he created recently. We had just watched the movie "Chef" for the first time, and he has been inspired in the kitchen ever since. If you haven't seen it yet, you will want to make sure that you have the fixin's on hand to make a grilled cheese sandwich about halfway through the movie. If not, you will be craving one until you can get to the store for bread and cheese. Trust me.


Years ago we discovered the wonder that is Penzey's "Sandwich Sprinkle". Their headquarters is in Wisconsin, but they have retail outlets in many other states in the U.S.  I buy all of my spices and extracts a few times a year from the Penzey's website. I add a dash of Sandwich Sprinkle to both sides of the buttered bread before grilling it and it's FANtastic.


Grilled Cheeses                                                                                               Printable Version

Two slices of bread, 1/2" thick
Butter
Two or more slices of cheese (American, Colby-Jack, Provolone, or a combination)
Penzey's Sandwich sprinkle (optional)

Butter one slice of the bread, getting all the way to the edges. Shake on some Sandwich Sprinkle, if using. Place the bread butter side down in a medium skillet, then turn it on to medium heat. Place the cheese slices on the bread, and top with the second slice of bread. Butter this piece, then shake on additional sandwich sprinkle. Let the sandwich cook slowly, so as not to burn it. Peek under the sandwich occasionally to see when the bread has browned to your liking. Flip the sandwich over and brown the other side. When finished, flip the sandwich onto a plate "hot side" up to prevent it from getting soggy, cut it in half, and serve with ketchup or tomato soup for dipping.

Monday, January 26, 2015

Chili


Everyone likes their chili a certain way; super spicy or medium hot, with or without meat, with or without beans. In true Scandinavian fashion, our version of chili is pretty bland, but people who try it love it because it is so different from other chili recipes. Our recipe uses meat AND beans, but you can leave out the meat and add in a can of corn to make a vegetarian version. 

Adding toppings to the chili can make it your own; toss in some shredded cheese, crackers, sour cream, sliced green onions, or jalapenos to spice it up.

I usually make a double batch of chili; it freezes beautifully, and is great to pull out on a cold day when I don't have time to cook. I like to serve it with a warm slice of homemade cornbread that has been slathered with butter and a drizzle of honey.


Chili                                                                                                  Printable Version

1 lb. ground hamburger or turkey
1 medium onion, chopped
2 soup cans of water
1 large can crushed tomatoes
1 can light red kidney beans, drained
1 can black beans, drained
1 can chili beans, with the juice
1 Tbsp. chili powder (as hot as you like it)
1 tsp. ground Ancho chili pepper
1 tsp. ground cumin
1 Tbsp. brown sugar
1 dried bay leaf

In a large pot over medium-high heat, brown the meat with the onion. Turn the heat to low and add in the tomato soup, then use the soup can to add two cans of water. Add the crushed tomatoes, kidney beans, black beans, and chili beans and stir together well. Sprinkle in the chili powder, Ancho chili pepper, cumin, and brown sugar and stir to combine. Stir in the dried bay leaf. At this point you can add more water, depending on how thick you like your chili.

Let the chili simmer for an hour, remove the bay leaf, dish into bowls, and serve with cornbread and toppings.

Friday, January 23, 2015

Tortilla Rollups

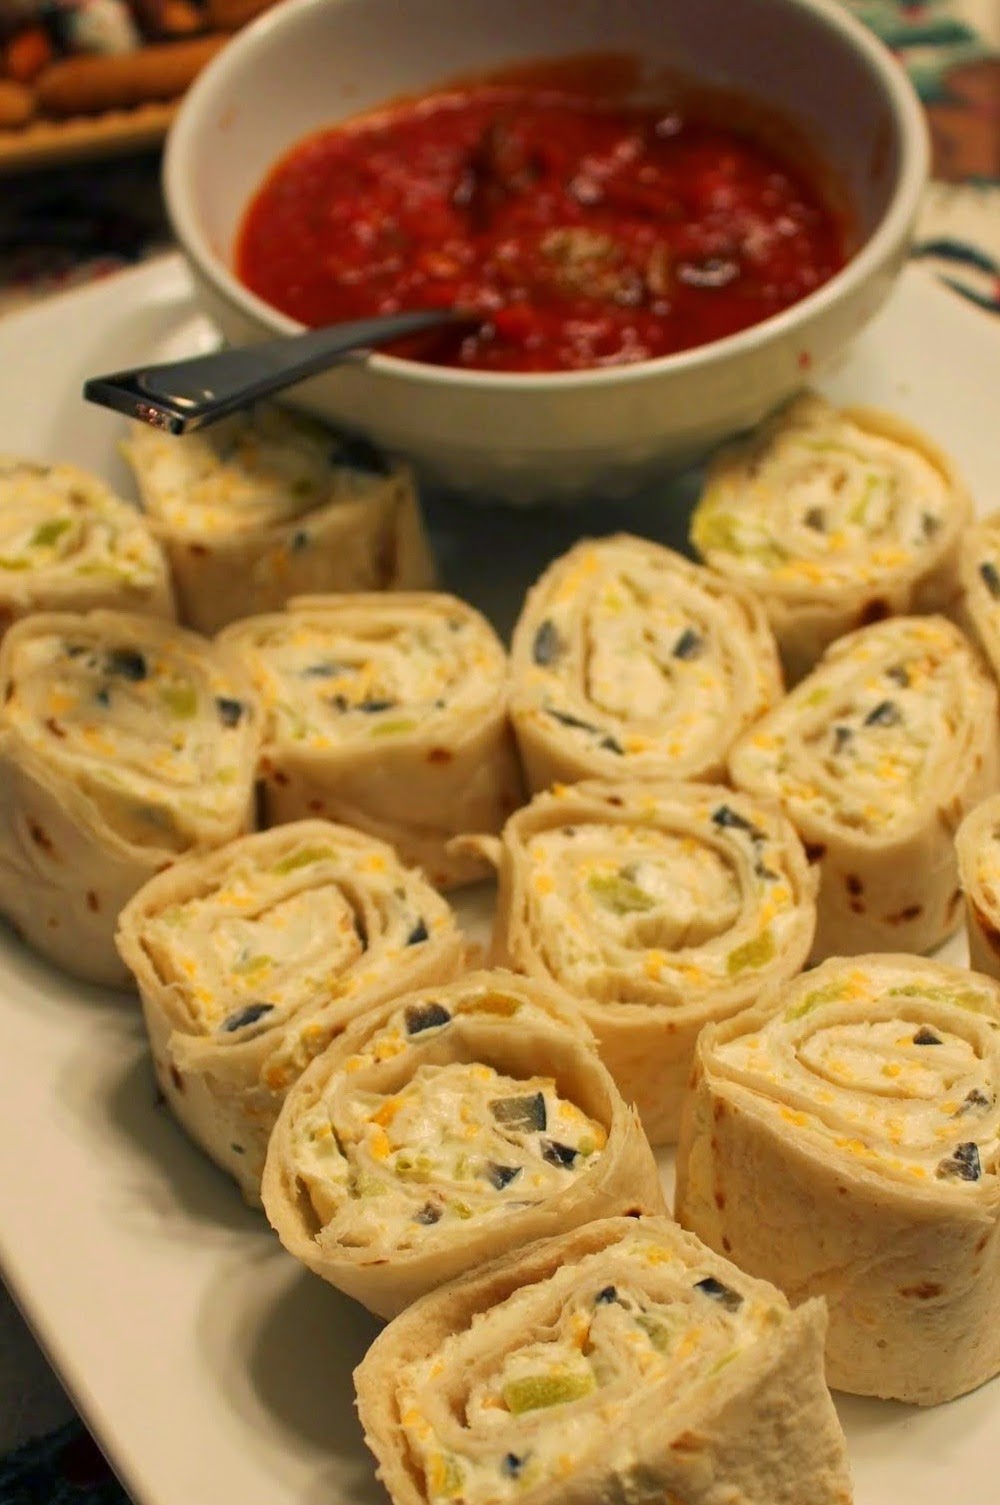
For almost any get together our family has that requires snacks, these Tortilla Rollups always make an appearance.

This is a recipe that you can mess with. I usually add some finely shredded cheese to the mix when I make these at our house. You can substitute green olives for the black olives or use some of both. You could use flavored tortillas instead of plain. And you could even use a flavored cream cheese if you wanted. It's fun to play around with recipes and make something new out of a tried and true recipe.

We usually have a bowl of "Heather's Salsa" ready to dip these in, but store bought salsa will work just as well. You can set these next to a giant bowl of tortilla chips and the two snacks can share the salsa!


TORTILLA ROLLUPS                                                                                     Printable Version

8 oz. package cream cheese, softened
1 can diced green chilies
1 large can black olives, finely diced
Green onions, finely chopped
1/2 tsp. garlic salt
1/2 tsp. black pepper
1 package flour tortillas

In a bowl, combine the cream cheese, green chilies, black olives, green onions, garlic salt, and black pepper. Stir until everything is well combined. Place a flour tortilla on a piece of plastic wrap you've laid out on the counter. Spread a thin layer of the cream cheese mixture over the tortilla, leaving about 1/4" clean around the edge of the tortilla. Roll up tightly and wrap securely in the plastic wrap. Chill in the refrigerator for at least an hour. When ready to serve, cut the wraps into 1" slices, place on a platter, and serve with salsa for dipping.

Tuesday, January 13, 2015

Chicken with Mushroom Marsala Sauce


Chicken Marsala is one of our family's favorite dishes to share when we are lucky enough to go to the restaurant Buca di Beppo. We usually fight over who gets the last piece of chicken. It's flavorful, juicy, and is one of those things you eat and ask "what IS that I'm tasting?" It's the Marsala wine that makes it so good, and the recipe calls for a whole bottle, making this somewhat of a luxury meal. I've tried both dry and sweet Marsala in this, and either one is wonderful. The recipe might sound intimidating, but it's really very easy and quick to make, and worth the price.

Over the years I've messed with this dish to try to match the recipe at Buca, and I know I'll never master it, but this is pretty darn close. Served with some garlic mashed potatoes and a good glass of wine, it's an awesome meal.

Season the chicken with salt and pepper.  Pour the flour into a shallow dish and dredge the chicken in the flour. Heat the olive oil in a large saute pan over medium heat, then add the chicken and saute until golden brown on both sides. Remove the chicken and set aside.


Add the mushrooms to the remaining pan drippings and saute for a couple of minutes. 


Carefully pour in the Marsala wine (do this off the flame if you have a gas stove) and raise the temperature to medium high to bring the sauce to a low boil. Cook until the sauce has reduced by half.


Remove the pan from the heat and stir the butter into the sauce.  This will give it a nice glossy finish.


Divide the chicken breasts onto separate plates and pour the mushroom Marsala sauce equally over the top. Serve with garlic mashed potatoes.


CHICKEN WITH MUSHROOM MARSALA SAUCE                                             Printable Version

2 pounds boneless, skinless chicken breast or tenderloins
Salt and pepper
Flour for dredging
Olive oil
One 8 oz. container button mushrooms
32 oz. bottle of Marsala wine (sweet or dry)
1/4 c. butter

Season the chicken with salt and pepper.  Pour the flour into a shallow dish and dredge the chicken in the flour. Heat the olive oil in a large saute pan over medium heat, then add the chicken and saute until golden brown on both sides. Remove the chicken and set aside. Add the mushrooms to the remaining pan drippings and saute for a couple of minutes. Carefully pour in the Marsala wine and raise the temperature to medium high to bring the sauce to a simmer, then cook until the sauce has reduced by half. Remove the pan from the heat and stir the butter into the sauce.

Place the chicken breasts on separate plates and pour the mushroom Marsala sauce equally over the top. Serve with garlic mashed potatoes.

Wednesday, December 17, 2014

Minnesota Chow Mein


Now that there is an abundance of fresh venison in our freezers, we can make one of our very favorite dishes, Chow Mein. 

I call it "Minnesota Chow Mein", because it's not like any Chinese food you would buy at your local restaurant. I guess it's a lot like using the term "Tex-Mex"; it tastes like Chinese food, it looks like Chinese food, but uses less of the traditional ingredients you would find in a traditional Chinese recipe. I snuck in a few teaspoons of sesame oil when I made it this time, and it added a bit of modern flair that we really liked, but I'm sure that wasn't a pantry staple in Northern Minnesota when this recipe was created. 

My Great-Grandma Ethel's ability to make meals that 50 years ago were truly "ahead of her time" was amazing. Some day we will talk about her adventures in "Sweet and Sour Spam". But for today, let's enjoy a warm bowl of her chow mein, shall we?

Add the oil to a large saucepan.  Add the cubed meats, onion, soy sauce, and pepper and brown until the onions have softened. 


Add enough water to almost cover the meat and onions.  Let simmer over low heat for one hour until the meat has become tender, stirring occasionally, and adding more water if needed to keep it from sticking to the bottom of the pan.


Add in the mushrooms, celery, bean sprouts, and water chestnuts.  Add a bit more pepper if you like.


Use the empty can from the bean sprouts and fill it with water, adding two cans total to the pot. 


Let the chow mein cook for another 30-45 minutes until the vegetables are as tender as you would like them to be. Some people prefer a bit more crunch to their chow mein vegetables, so watch the pot and take it off the heat when it's where you want it to be.


Serve the chow mein in a big bowl and top with crunchy chow mein noodles and additional soy sauce if you prefer a saltier dish.


Minnesota Chow Mein                                                                 Printable Version

1 T. olive or vegetable oil
Pork round steak, cubed
Venison or beef steak, cubed
1 large onion, coarsely chopped
2 tbsp. soy sauce
1 tsp. black pepper
Water
1 pkg button mushrooms, sliced thickly
1 pkg celery, sliced thickly, on the diagonal
1 can bean sprouts
1 can water chestnuts, sliced
2 cans of water (use the bean sprout can)

Crunchy Chow Mein noodles
Additional soy sauce, if desired

Add the oil to a large saucepan.  Add the cubed meats, onion, soy sauce, and pepper and brown until the onions have softened. Add enough water to almost cover the meat and onions.  Let simmer over low heat for one hour until the meat has become tender, stirring occasionally, and adding more water as needed to keep it from sticking to the bottom of the pan.

Add in the mushrooms, celery, bean sprouts, and water chestnuts and stir together well. Use the empty can from the bean sprouts and fill it with water, adding two cans total to the pot. Let the chow mein cook for another 30-45 minutes until the vegetables are as tender as you would like them to be. Serve in a bowl and top with crunchy chow mein noodles and additional soy sauce if you prefer a saltier dish.

Sunday, November 23, 2014

Homemade Cranberry Sauce

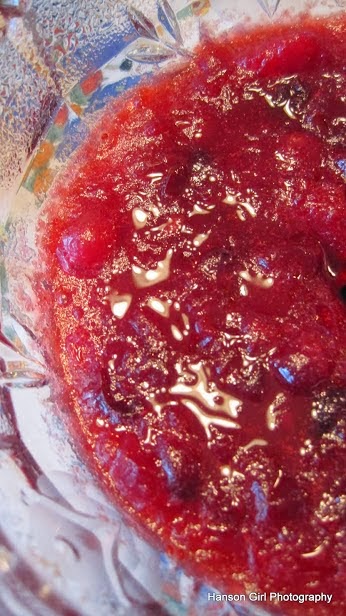
One Thanksgiving recipe that hasn't changed is Mom's "Homemade Cranberry Sauce". Every year she serves a glamourous red bowl of it alongside all the other fixins'.  

Puckery-tart and as sweet as it needs to be, making cranberry sauce from scratch is worth the effort.


Homemade Cranberry Sauce                                           Printable Version

One 12 oz. bag fresh cranberries
3/4 cup prepared orange juice 
2/3 cup brown sugar
1/4 tsp. cinnamon

Wash and drain the cranberries and pour into a medium sauce pot. Stir in the orange juice, brown sugar, and cinnamon. Bring to a boil over medium-high heat, then reduce the heat to medium and cook for 10 minutes, stirring occasionally until the cranberries burst. If you want a thicker sauce with less whole berries, give them a mash in the pot as you stir them. Remove off the heat and let cool. Store in the refrigerator.

Cranberry sauce is best if made the day before you plan to serve it, as this allows the flavors to meld.


Saturday, November 22, 2014

Turkey Gravy

Whether you like to make a well in your mashed potatoes and try to keep it contained, or go all out and drench everything on your plate in it, gravy is the stuff that makes Thanksgiving dishes taste even more amazing.

I remember watching Granny at Mom's stove making the gravy for many years. Mom would get out her mason jar she had saved in the cupboard just for the task, add flour and some water, and shake it all up until all the lumps were gone. Then Granny would stir this mixture into the turkey drippings Dad had poured off the giant turkey, and it would turn into something magical with a few stirs of her spoon.

I started making the gravy a few years ago when Granny got too shaky to stand at the stove, but she still keeps a watchful eye on me as she sits in her spot at the table waiting for the meal to begin.

As the modern young woman that I am, I do it completely different than the ladies in my life, even as Mom raises her eyebrow at me from the corner of the kitchen.  

Gravy is simple; 3 Tbsp. butter, 3 Tbsp. flour, salt & pepper to taste, and enough turkey drippings to make it as thick as you like. No fancy seasonings, no flourishes, just basic yummy gravy. If you want to make a bunch of gravy, you just increase the quantity of all the ingredients. Leftover gravy is excellent to drizzle over pieces of turkey that might have dried out a bit, I always make a bigger batch so we have leftovers to pop in the fridge.


Turkey Gravy                                                                    Printable Version

3 T. butter
3 T. all-purpose flour
Drippings from the turkey (you can substitute canned broth or stock)
Salt and freshly ground pepper

In a medium saucepan over medium-high heat, melt the butter. Whisk in the flour to create a paste, and let it cook for a few minutes, stirring constantly, to release the raw flour taste. Slowly pour in the turkey drippings a little at a time, letting it come to a low boil, and adding  more drippings if the gravy is too thick (it will thicken up as it cooks). Lower the heat to keep the gravy at a simmer, and stir occasionally until ready to serve.


Monday, November 17, 2014

Liver and Onions with Bacon

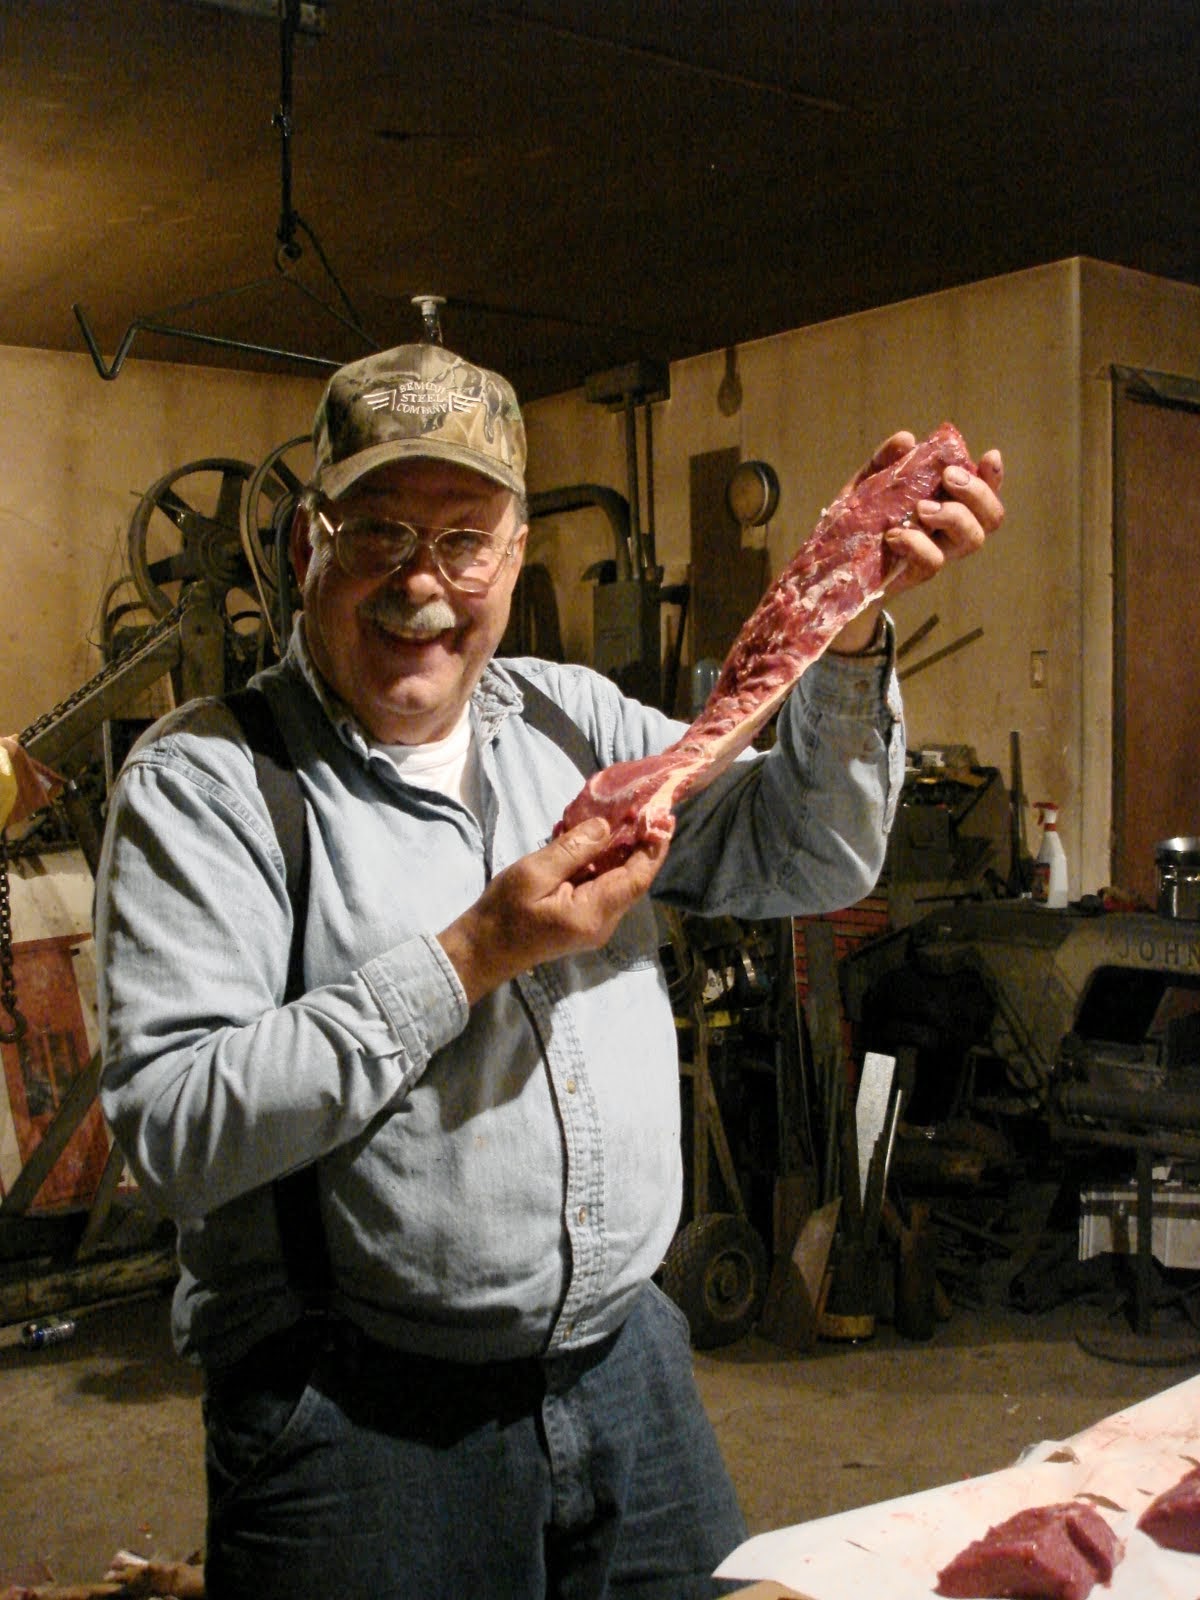
We have been very fortunate to have a few deer to put in the freezer this hunting season. So it's been back to "The Shop" to cut it up, then a jaunt back to Mom's kitchen to wrap and label. Dad even bought a new little freezer this year to store the extra meat in, which means we have certainly been blessed with meat to last us quite a while.

Our family has always taken it upon ourselves to cut up our own venison, then we bring it to our local Locker Plant to have the scraps made into burger, deer sticks, summer sausage, and Polish sausage. The steaks, tenderloins, stew meat, and roasts are wrapped and popped in the freezer while we wait for the rest to be ready, thinking about that first juicy burger that will hit our plate soon.

Mom's a bit squeamish about all the blood involved, and has to take a break now and then, but she's a trooper for sure. She is a "Professional Meat Wrapper", and beyond the "Neck Soup with Barley" that Dad makes out of the neck meat right away, she is the creator of all the yummy meals that use what Dad worked so hard to provide for us.


It's a family event that has been mastered over my Dad's 62 years of deer hunting.  He wields the knife and saw like the pro that he is.  He has not missed a year in the woods since he was 10 years old, and he now takes The Kid and I out with him to pass on his legacy. I can't imagine a better man to teach us.


Back in the day, when I was a younger gal, Mom would use the liver from the deer to make "Liver and Onions". Nowadays, you have to worry about diseases, and it's not recommended that you use the organ meat from a deer. But let me tell you, if a friend or family member happens to buy a cow, and is willing to bring us the liver, the skillet is comin' out folks.

Liver and onions is one of those dishes your kids are gonna freak out about.  In my house we have a rule, The Kid has to try ONE BITE of something new, as much as he doesn't think he will like it. Then if it's as gross as he figures, he doesn't have to eat any more of it. Happily this rule has lead to him to liking A LOT of foods that he never would have known he really liked. He even enjoys some of Grandpa's creations that even I can't swallow, like radish sandwiches and raw onions. 

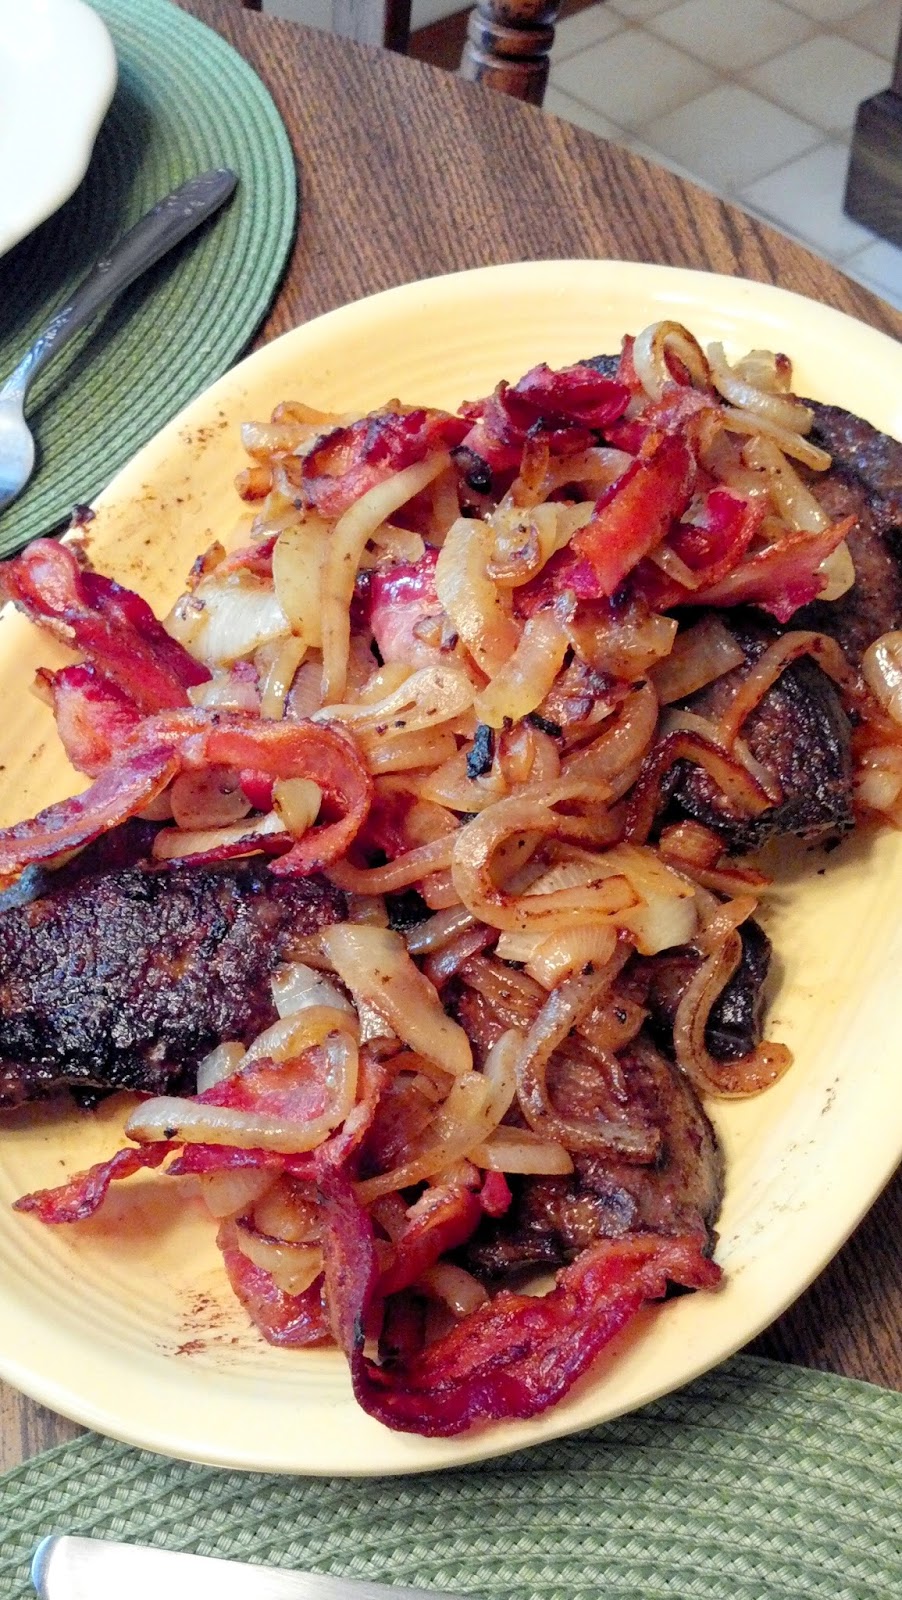
If you are so inclined, and you have no health issues (liver is high in cholesterol and iron), dietary or personal preferences that would keep you from making this dish, give it a go. Just the fact that it's smothered in bacon and onions makes you want to at least try a bite.  This is a dish we only get to make once every few years or so, and to say we enjoy it is an understatement.

We have found that serving liver with a bit of classic yellow mustard gives it an awesome tang, and cuts back on the gamey flavor of the meat.  Our side dish is always boiled potatoes, topped with melted butter and some salt and pepper.


LIVER AND ONIONS WITH BACON               Printable Version

Beef liver
1 lb. bacon
1 large yellow onion
1 c. all-purpose flour
1 tsp. salt
1 tsp. pepper

Boiled potatoes
Classic yellow mustard

Separate the bacon into slices.  Slice up the yellow onion. In a large skillet, fry the bacon and onions until the bacon is cooked and the onions are soft.  Remove from the pan to a plate, leaving the bacon drippings in the pan.

Stir together the flour, salt and pepper in a shallow bowl.  Slice the beef liver into 1/4" thick slices.  Dip the liver in the flour mixture and coat both sides.  Fry in the bacon grease until browned on both sides.  Add the cooked bacon and onions back into the pan.

Pour onto a large platter.  Serve with a squirt of yellow mustard for dipping the liver, and boiled potatoes with butter.

Friday, November 14, 2014

Spinach Dip with Sourdough Dunkers

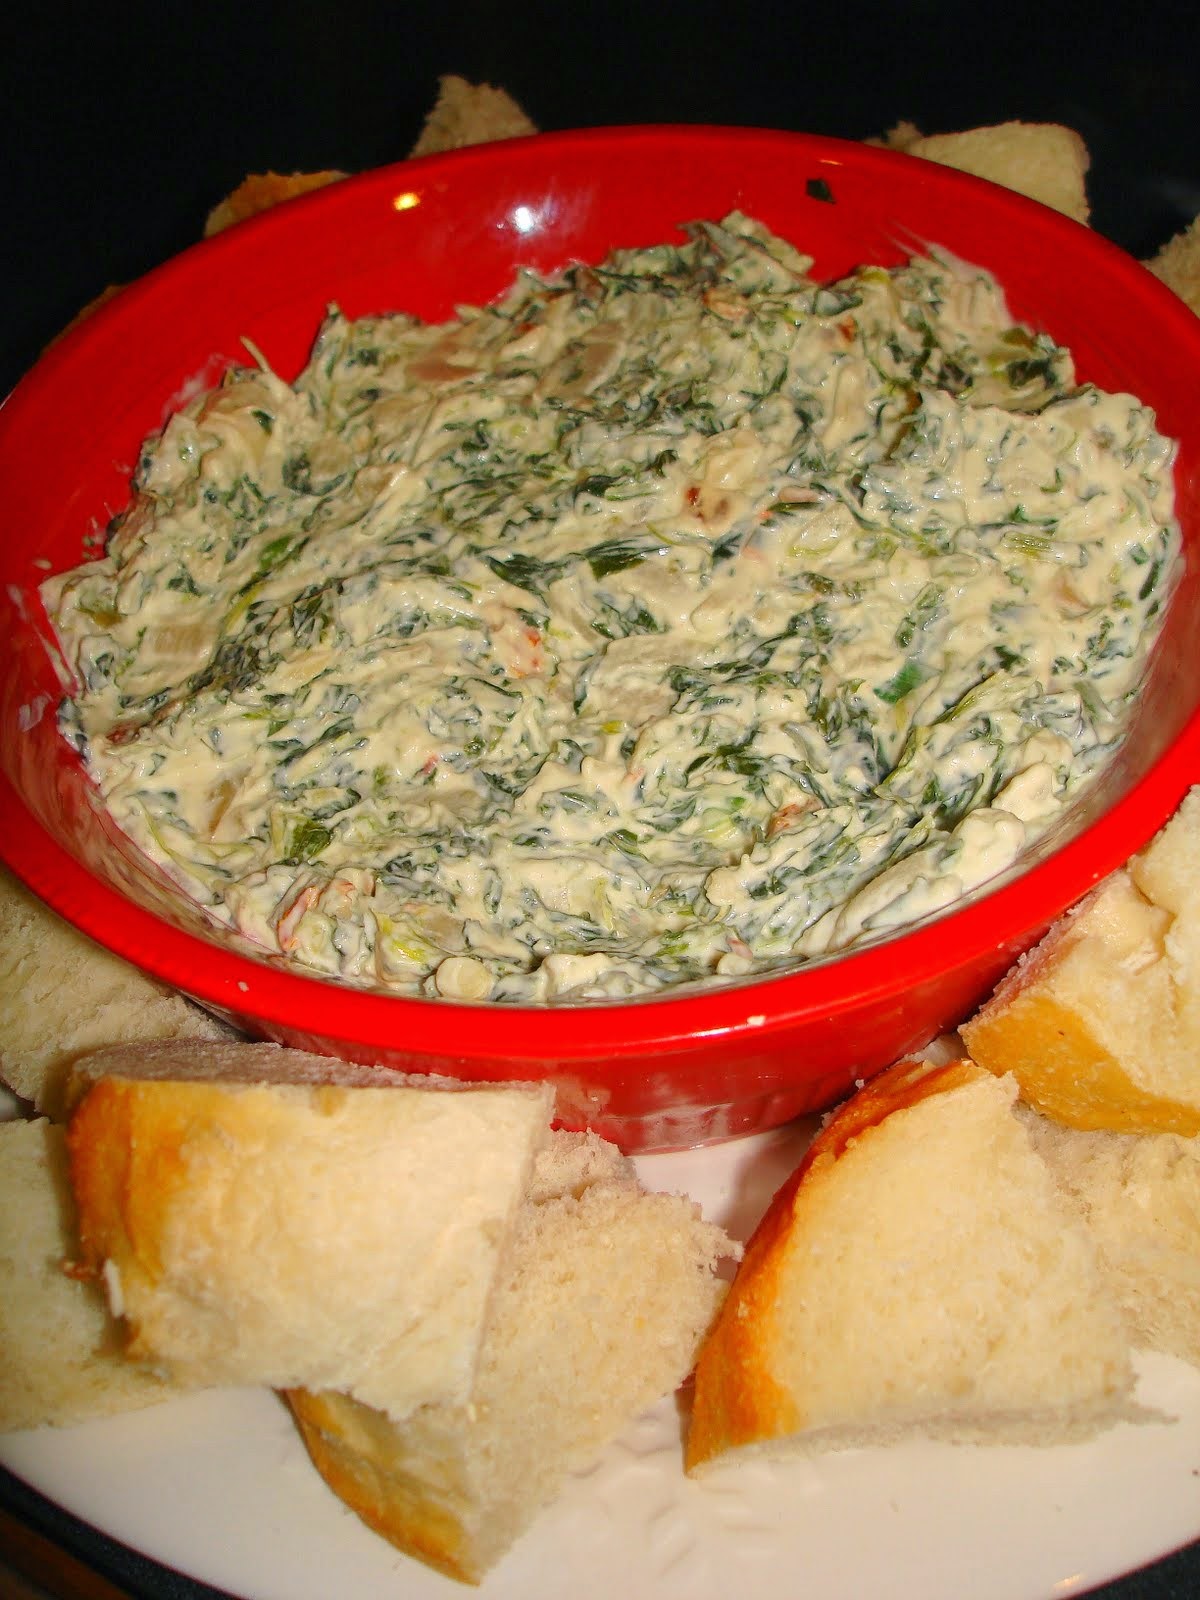
If our family is together for a holiday, be it The 4th of July, Christmas, or New Year's Day, there is almost always Spinach Dip on the giant table of sweet and savory treats that Mom has assembled for us to dig into. We also make it throughout the year for times when we want something yummy to nosh on while watching a good movie, and eating it when it's not a holiday seems to make it taste even more special in some way.

The dip is usually served in a hollowed out loaf of Sourdough bread. The insides are cut into chunks and placed around the bread bowl. Baking homemade bread is something I plan to dive into this Winter, but until I become a Master breadbaker, we will continue to buy our Sourdough bread from the grocery store.

Now and then the store will be out of the round loaves, but will have longer loaves available. If this happens, we simply slice the bread into thick slices and cut it into dunkers. You can throw some crackers on the plate for dunking as well.


SPINACH DIP WITH SOURDOUGH DUNKERS            Printable Version

1 box chopped spinach, thawed
1 16 oz. container sour cream
1 c. Hellman's mayonnaise
1 pkg. dried vegetable soup mix
1 8 oz. can water chestnuts, drained and diced
1/2 tsp. garlic powder
Salt and pepper to taste
Chopped green onions or chives
Round loaf of Sourdough bread

Thaw the spinach, wrap it in paper towels, and squeeze it to release as much water as you can.  Separate the spinach and put in a medium size bowl.

Add the sour cream, mayonnaise, vegetable soup mix, water chestnuts, garlic powder, and salt and pepper. Stir well to combine.  Pour into a hollowed out loaf of Sourdough bread, or put into a pretty dish and garnish with chopped green onions or chives. Cut the bread into dunkers and serve alongside the dip.

Saturday, November 8, 2014

Ducks and Pheasant and Geese, Oh My!

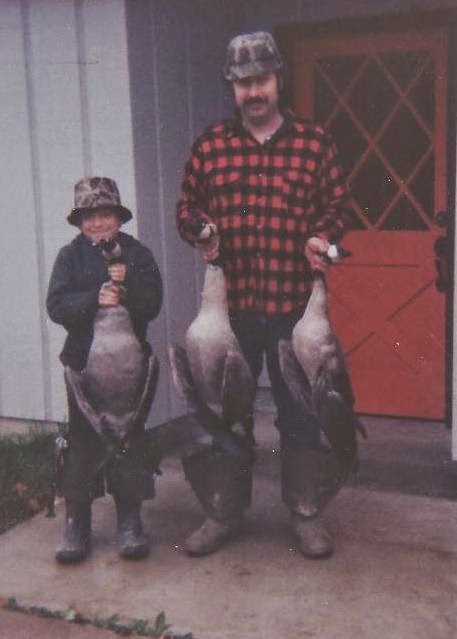
The majority of our meals come from the land and the water that surrounds us.  But during a few special months of the year, our meals come from the AIR.

From my Great-Great Grandpa George and Grandma Ethel...

to my dad and brother...


we enjoy bird hunting, and LOVE bird eating.

Dad used to hand harvest wild rice every Summer, and it would be used in this recipe for "Partridge Hot Dish". Wild rice can be purchased in the grocery store, just look for the kind that isn't commercially made. Commercially made wild rice is almost black in color, and tastes NOTHING like the brown wild rice that is hand harvested. Believe me, it's worth every extra penny to get the real stuff.  

This hot dish can be made with any kind of bird; grouse, pheasant, goose, duck. Some boneless chicken breasts would even work in a pinch. As long as you have a bed of wild rice to nestle it into, it will be wonderful.

Crack open a can of cranberry sauce to serve along side this for a little zing.

Partridge Hot Dish                              Printable Version

Two birds, cleaned and cut up into chunks
Olive oil
1 c. onions, diced
1 c. celery, diced
1 c. cooked wild rice
1 can cream of mushroom soup
1 c.water
1 can peas
1 can mushrooms
4 Tbsp. soy sauce

Measure 1/2 cup of wild rice into a large glass bowl. Wash and rinse it with cold water until the water is no longer cloudy.  Bring 3 cups water to a boil in a medium pot. Add the wild rice, then reduce the heat to maintain a low boil. Cook until the rice is tender, about 45 minutes.  Drain the rice in a fine-mesh colander so as not to lose any grains down the drain.  Pour 1 cup of the cooked rice into a large bowl. You can use what's left for another dish, or just sprinkle it with some salt and pepper and eat it as a side.

In a medium skillet, add olive oil, onions and celery and cook until both are soft and nicely browned.  Add this to the bowl of wild rice. Stir in the cream of mushroom soup, water, peas, mushrooms, and soy sauce.

Brown the partridge in olive oil.  Stir it into the wild rice mixture.

Coat a 2 qt. baking dish with non-stick cooking spray and spread the mixture into it. Cover with foil and bake at 350 degrees for about an hour.  Serve with cranberry sauce on the side.

Thursday, November 6, 2014

Swiss Steak with Mushrooms

I had to do some digging for this recipe, because even though our family's meals over the years have always revolved around venison, we haven't been lucky enough to have a freezer full of it for a while.  Mom reminded me how to cook it properly, and argued with me about adding sherry to the sauce, but agreed it might be a nice touch; she will be trying it that way "next time". I use all of our family recipes to a "T", but I like to add a little of my own flair to the pot sometimes.

"Swiss Steak with Mushrooms" utilizes one of the tougher cuts of venison, round steak. But after beating it into submission and simmering it for an hour with some sauteed mushrooms and onions, it turns into a melt-in your-mouth meal.

Some people don't like venison because they say it's too tough, or too "gamey", but cooked this way, it's amazing. You will become a venison fan overnight.

You can add a dash of sherry to the sauce before you start the simmering process, or go the Meatballs and Mashed Potatoes with Mushroom Gravy route and add a can of mushroom soup and some milk to produce a thicker gravy after it's done simmering.


Good luck in the woods this weekend!

Swiss Steak with Mushrooms                    Printable Version

Fresh white button mushrooms, sliced
Medium yellow onion, sliced
Olive or vegetable oil
Round steak
Flour
Salt
Pepper
Sherry (optional)

In a large frying pan, add the olive or vegetable oil.  Add in the sliced mushrooms and onions and cook until the onions are soft.  Remove from the pan into a bowl, leaving any drippings behind.  You will add these back in later in the cooking process.

Pound the round steak to about 1/4" thickness with a meat tenderizer. In a shallow dish, mix together the flour, salt and pepper. Dredge the pieces of meat in the flour mixture. Add a bit more oil to the frying pan and brown the meat until almost cooked through (it's good to leave venison a little red in the middle, it will continue cooking in the sauce). Pour the cooked mushrooms and onions back into the pan, cover with water, stir in a dash of sherry if you wish, and let it simmer on low for about an hour, stirring occasionally and adding more water as needed so the pan doesn't get dry.

Serve the steak right from the pan with the sauce, or remove the meat to a plate and add a can of mushroom soup and some milk to the pan to make a thicker gravy. Heat the soup through before serving the gravy over mashed potatoes.

Tuesday, November 4, 2014

Venison

Our family hunts; birds, deer, elk, moose...Dad has passed on his knowledge and techniques through two generations, so far. Growing up we always had venison in the freezer, and processing and packaging it is a family affair.

We cut up our own deer, and bring part of it to a local meat locker to have it mixed with beef for ground meat. The rest is cut up into tenderloins, pounding steaks, and stew meat.

Thanks to a City bow hunt that Dad participated in this fall, we have already been able to eat some fresh venison steaks and burgers, but there is still room in the freezer for more!  Deer sticks and summer sausage are my favorites, so I'm hoping the next deer we get will be dedicated to them.

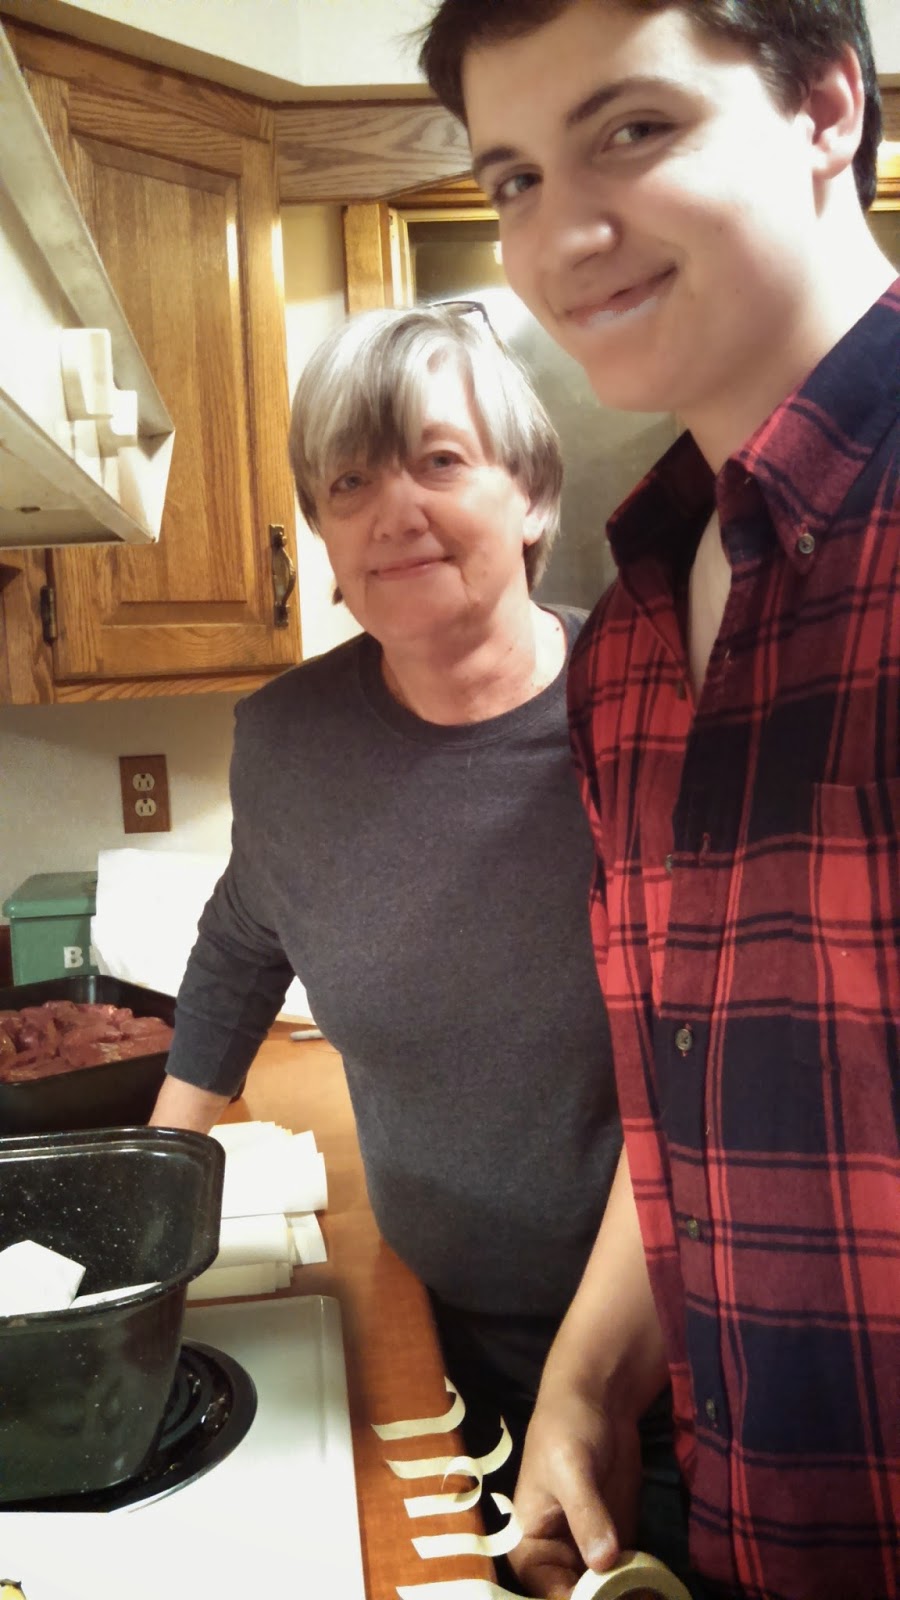
The kid finally learned the wrapping process, and was in charge of tape.  


Dad made this handy dandy paper cutter many years ago, and was in charge of ripping off just the right size sheets of freezer paper.


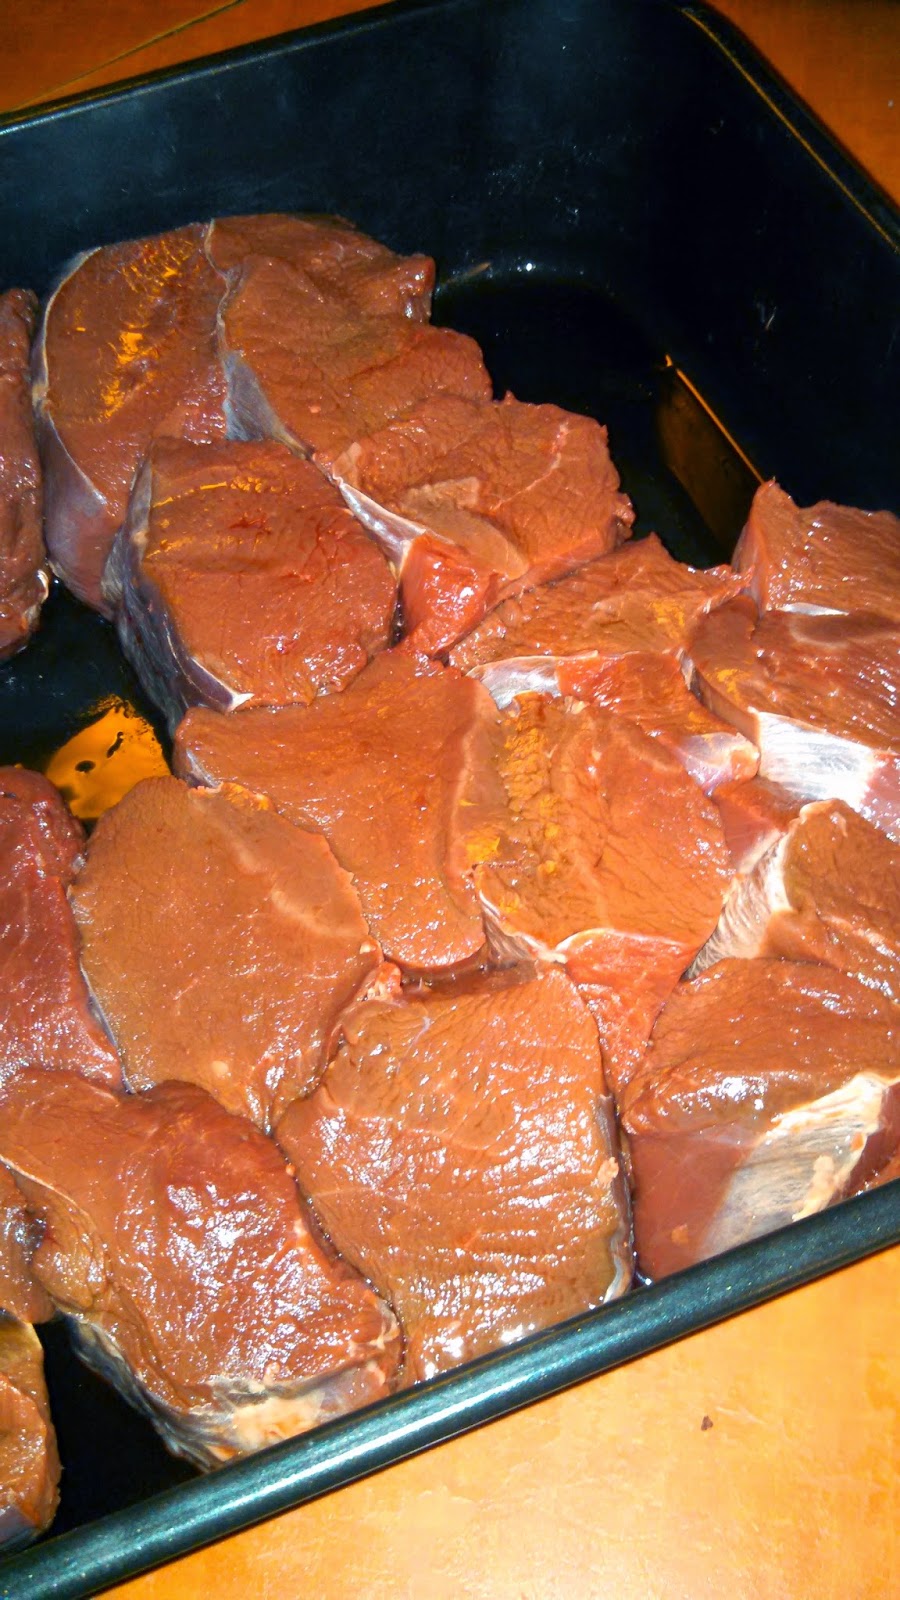
Mmmm...tenderloins.  These will be made into Swiss Steak with Mushrooms very soon.


We started hunting with Dad last year, and though we didn't see a thing, learning patience and enjoying some bologna sandwiches and Pringles in the deer stand was sure fun.  This year we will hopefully get to enjoy the full hunting experience, from shooting to eating.

Monday, October 27, 2014

Mom's Beef and Bean Tacos, and a Neat Trick

Tacos seem like a quick and easy thing to make, but if you're the one doing all the topping chopping, you know that isn't true. Of course you can buy a lot of things already shredded or cut up for you, but it still takes some time to put it all together. We didn't have tacos for dinner very often when I was growing up, but when we did, it was a true fiesta.


Heat your oven to 250 degrees. Lay some hard taco shells out in a single layer on a baking sheet.

In a large skillet over medium-high heat, brown the ground meat. Turn the heat to low, sprinkle the taco seasoning over the meat, then pour the water over the top. Stir everything together well and let it simmer until thickened.


The unique part of Mom's recipe is the addition of refried beans. If you don't like refried beans, by all means leave them out.  But if your game, stir them into the meat mixture. Not only is this really, really good, but it will extend the amount of filling you have. And a plate of nachos topped with some leftover taco meat for lunch the next day is not a bad thing.


About 5 minutes before you are ready to eat, pop the sheet of taco shells in the oven. You will keep these warm while you eat, and can grab a couple when people ask for seconds. Or thirds. If you want to have soft tortillas as well, wrap them up in some aluminum foil and toss them into the oven about 10 minutes before you expect to eat, as they will take a bit longer to heat through. When you sit down to the table, turn off the oven so the shells don't burn, but will still stay warm.

You could also warm the shells and tortillas in your microwave, but "back in the day" we didn't have a microwave. And warming them in the oven produces a much yummier result. Take the time to flip on your oven, it will be worth it.

Get together your toppings and set them out in individual bowls to make a "taco bar".


Dad's trick to avoid having your taco turn into a broken mess right after you take the first bite, and having to eat the rest off your plate with a fork, is what we call an "Open-Faced Taco".

Take a warmed taco shell out of the oven and CAREFULLY break it in half. Place it on your plate.


Spread on some of the meat and bean mixture...


add shredded cheese to get it melting...


top with some of "Heather's Salsa"...


add some sliced black olives...


then finish off with some lettuce, a dab of sour cream, and some fresh tomatoes...


or squirt on some Ranch dressing instead (kids will love this).


Of course you can use other toppings like taco sauce, jalapeno slices, diced green pepper, raw onion, diced avocado, corn kernels...and make each taco exactly how you like it.  A dab of "Guacamole with Options" would also be fantastic.

Making an open-faced taco means you get a taste of every topping in every bite.  It does require being able to hold the half shell with a firm hand, so kids might want to stick with the traditional method. You can also slap a soft tortilla on your plate and wrap the toppings up inside.

However you choose to make them, tacos made at home taste oodles better than those you buy at one of those taco joints, and are much healthier to boot.


MOM'S BEEF AND BEAN TACOS                              Printable Version

1 lb. ground beef or ground turkey
1 packet taco seasoning
3/4 c. water
1 box taco shells, white or yellow corn (whichever you prefer)
1 package tortillas, flour or corn
Cheddar cheese, shredded
Lettuce, chopped
Tomato, diced
Black olives, sliced
Salsa
Sour cream
Ranch dressing

Any other toppings you enjoy: taco sauce, jalapeno slices, green peppers, raw onion, diced avocado, corn kernels

Preheat your oven to 250 degrees.

In a large skillet over medium-high heat, brown the ground meat. Turn the heat to low, sprinkle the taco seasoning over the meat, and pour the water over the top. Stir everything together well and let it simmer until thickened.

While the meat is simmering (about 5 minutes before you are ready to eat), lay some hard taco shells out in a single layer on a baking sheet and pop them in the oven. You will keep these warm in the oven while you eat, and can grab a couple when people ask for seconds. Or thirds. If you want to have soft tortillas as well, wrap them up in some aluminum foil and toss them into the oven about 10 minutes before you expect to eat, as they will take a bit longer to heat through.

Fill your taco shells or tortillas with meat and toppings.

Saturday, October 25, 2014

Sweet and Spicy Butternut Squash Soup

I might be the only person in our family who doesn't like squash. When I was a child, we had to eat everything on our plates, and that was by far one of the hardest side dishes for me to get down. But Mom and Dad LOVE squash, roasted and topped with butter and brown sugar, or made into a pie that uses squash instead of pumpkin. 

I vowed as an adult to find a way to like squash. It's something you can plant in your garden and get a bountiful crop of every year, and you can use it in so many dishes. 

Last Fall I fiddled around with a batch of Butternut Apple Coconut Soup. It had fresh apples and sweet onions roasted along with the squash, and hints of coconut and thyme blended in. This Fall I decided to try something a little different that wouldn't require quite as much time to make.

Our local Mennonite farmer had an abundance of many different kinds of squash available at the Saturday market, so I grabbed two good size butternut squash...and a couple of buttercups for Mom.

Wash the outside of the squash, peel them, cut off the tops and bottoms, cut them in half, scoop out the seeds, and cut the "meat" into chunks.  Spread into two baking sheets that you have lined with aluminum foil.


Mince two cloves of garlic and disperse them evenly over the squash in the two pans.  Drizzle with olive oil, then sprinkle with onion powder, pumpkin pie spice, salt and black pepper.  Give it all a good mix with your hands so everything is coated well.  Roast in a 350 degree oven for about 30 minutes until the squash is soft.


Remove the squash from the oven to cooling racks. If you are ready to continue on with the soup, scrape the squash and the pan drippings into a large sauce pot; if not, scoop it all into a large plastic container, cover it, and refrigerate until ready to use.

Turn the heat under your sauce pot to medium. Add 1/4 cup honey and 2 Tbsp. minced candied ginger and mix well.  Pour in a quart of half and half and stir to combine.

When the soup has heated through completely, blend it in the pot with an immersion blender. I purchased my Cuisinart immersion blender a few years ago, and I don't know what I ever did without it. 


If you don't have an immersion blender (you can find one from my Amazon link over on the right side of the blog) you can carefully ladle the soup in batches into a regular stand blender and process until smooth, being careful to keep the top on the blender to avoid any burns from soup that might fly up out of the top. It doesn't hurt to place a kitchen towel over the top of the blender lid for safety as well.

When the soup is smooth, ladle a serving into a bowl and dollop with some Ginger Honey Lime Peach Jam, or for a little crunch add some chopped pecans. This soup is perfect to curl up with on a brisk Fall afternoon.


SWEET AND SPICY BUTTERNUT SQUASH SOUP                    Printable Version

2 butternut squash
2 garlic cloves
Olive oil
2 tsp. onion powder
1 tsp. pumpkin pie spice
2 tsp. salt
2 tsp. black pepper
1/4 c. honey
2 Tbsp. candied ginger, minced
1 qt. half and half

Preheat your oven to 350 degrees.

Wash the outside of the squash, peel them, cut them in half, scoop out the seeds, and cut the "meat" into chunks. Line two large baking sheets with aluminum foil. Spread the squash into an even layer in the pans.

Mince two cloves of garlic and disperse them evenly over the squash. Drizzle with olive oil, then sprinkle with onion powder, pumpkin pie spice, salt and black pepper. Roast in a 350 degree oven for about 30 minutes until the squash is soft.

Remove the pans from the oven to cooling racks. If you are ready to finish the soup, scrape the squash and all the pan drippings into a large sauce pot; if not, scoop it into a large plastic container, cover, and refrigerate until ready to use.

Turn the heat under your sauce pot to medium. Add 1/4 cup honey and 2 Tbsp. minced candied ginger. Stir the mixture well, and when it has heated through completely, blend it in the pot with an immersion blender. 

If you don't have an immersion blender you can carefully ladle the soup in batches into a regular stand blender and process until smooth, being careful to keep the top on the blender to avoid any burns from soup that might fly up out of the top. It doesn't hurt to place a kitchen towel over the top of the blender lid for safety as well.

When the soup is smooth, ladle a serving into a bowl and dollop with some Ginger Honey Lime Peach Jam or some chopped pecans.

Tuesday, October 21, 2014

Meatballs and Mashed Potatoes with Mushroom Gravy

One meal I make every week is some version of meatballs; with spaghetti sauce and noodles, on sub rolls with a splash of marinara sauce and some melted mozzarella, and in this dish with mashed potatoes and gravy.

You can take the time to make your own meatballs, fry or bake them, then use them in this dish, but for me, the "store brand" meatballs my local Target store has in the freezer section are just the ticket. They come in beef, turkey, or Italian flavors, and all you need to do is pour them into the pan with a little water and go.

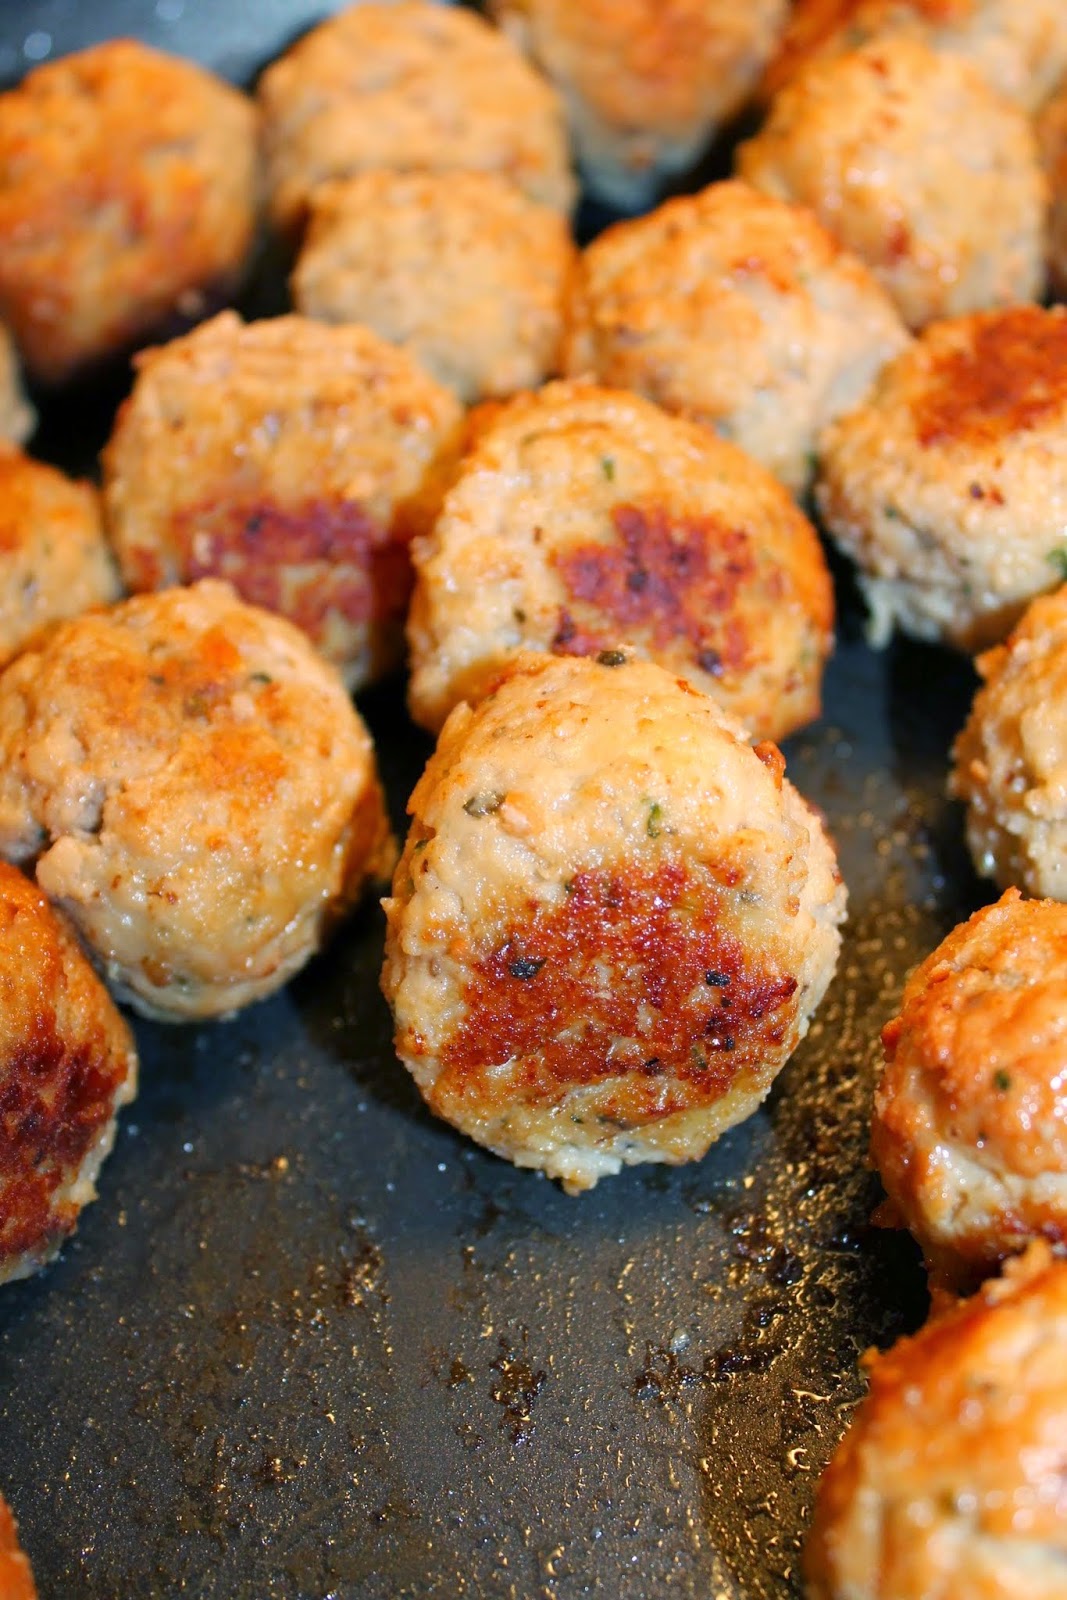
After the water cooks down, let the meatballs continue to cook a bit until they are nicely browned; I've found that getting that nice crust on your meat gives all your dishes a richer depth of flavor. Turn your heat to low after the meatballs are done.


Then you add a can of this stuff...I have every flavor of Campbell's cream soup in my pantry, and in a lot of the recipes we keep it is a main component, especially when we are aiming for that comfort food vibe.


Pour the soup into the pan, then add a half a soup can of milk. Add in a dash of Worcestershire sauce and some dried parsley, and stir it all together until mixed well. Let this lightly simmer on the stove while you prepare your mashed potatoes.

I mentioned in a previous post the wonder that is Ore Ida frozen potatoes, and the "Steam 'n' Mash" variety are our absolute favorite. Microwave for 10 minutes, pour into a bowl and add butter and milk as directed on the package, sprinkle in some salt and pepper, and mash until creamy.

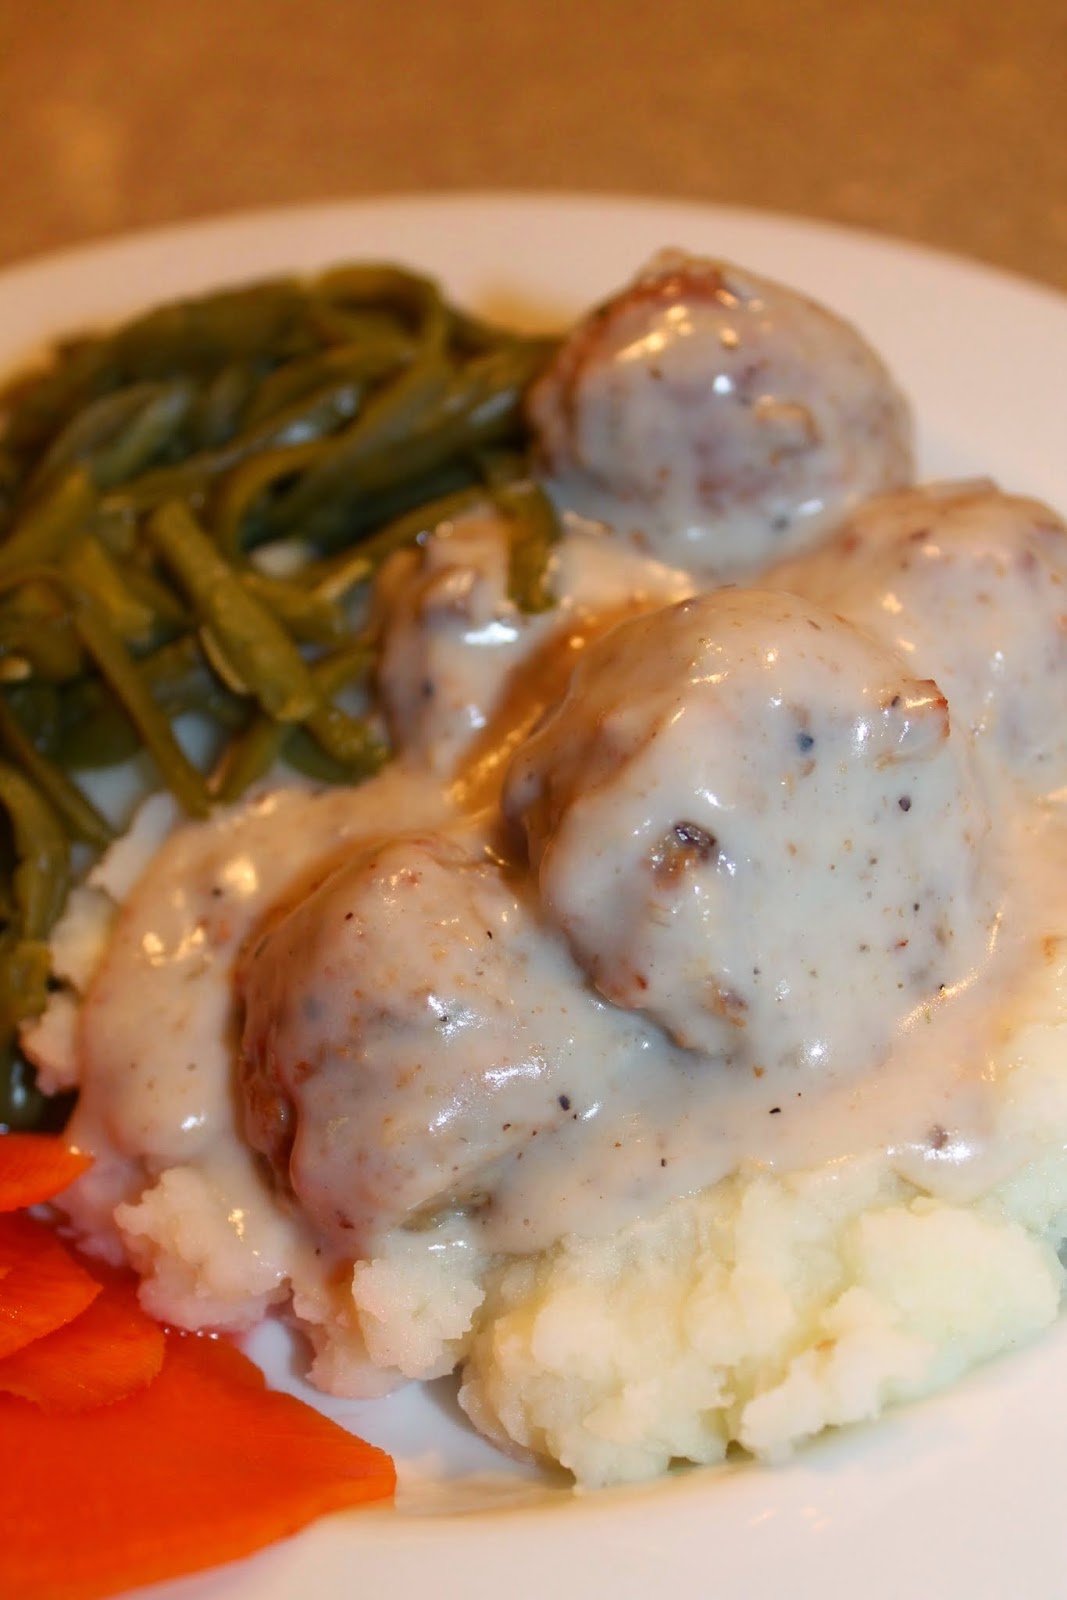
Scoop some potatoes into a bowl and make a well with the back of the spoon.  Place 4-5 meatballs in the well and cover with gravy. A side of green beans and a few of the Pickled Turnips we made this Summer completes the meal.


MEATBALLS AND MASHED POTATOES WITH MUSHROOM GRAVY


1 bag frozen meatballs
1/2 cup water
1 can cream of mushroom soup
1/2 cup milk
Worcestershire sauce
1 tsp. dried parsley
1 bag Ore Ida Steam 'n' Mash potatoes
2 Tbsp. butter
1/4-1/2 cup milk
Salt and pepper

In a large frying pan over medium heat, add the frozen meatballs and 1/2 cup water.  Simmer until the water evaporates, stirring occasionally, for about 10-12 minutes.  Let the meatballs get golden brown, then turn the heat to low.

To the pan, add a can of cream of mushroom soup.  Fill the soup can half way with milk and add it to the pan. Add a dash of Worcestershire sauce and the dried parsley.  Stir together well and let heat through. Leave on the stove while you make the mashed potatoes.

Prepare the mashed potatoes according to the package directions, and mash until they are the consistency you prefer, adding as much milk as you need.  Scoop the potatoes into a bowl, make a well, add 4-5 meatballs and pour some gravy over the top.