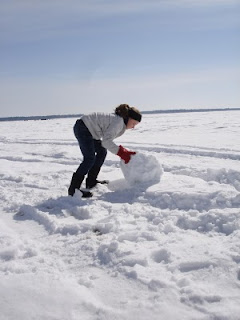
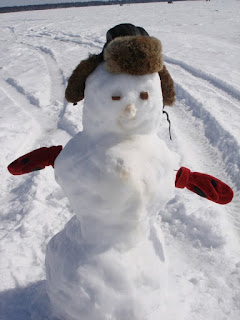
I have enlisted my niece, Savanna, in the process. She made this snowman last year while we were having a s l o w day on the lake fishing, and as always happens when you are fishing and things are s l o w, the fish start biting as soon as you put down your rod. But she did have enough time to get her man finished before I hollered for her.
Of course the first thing you need when building a snow man is what we call "snowman snow". The conditions have to be right, the snow a bit moist, and perfectly packable. If you squeeze a ball in your hands and it crumbles, go back inside and grab some hot chocolate, today is not your day.
But when it's just right (usually the snow that weighs 50 pounds a scoopful when you are trying to shovel yourself out of the driveway) have at it!
You will need to start by making the base. Collect snow around you into a ball on the ground. When you have it all together, start to roll it across your yard, packing the snow that sticks to the ball as you go, rolling it in different directions to get all the areas equally. You will want to end your rolling where you plan to display the finished man, so keep that in mind and don't stray too far away.
 Give the first ball a good whack to make sure he's solid. Then shape him up a bit and knock off anything goofy lookin'.
 Repeat with a second ball, making this one slightly smaller than the first. Again, remember to end at your destination.
  This is when you need to pull out the guns, as you will need to lift the second ball onto the first. It helps if you have a nice dad around to do this, but this chick is TOUGH, she needs no help whatsoever. Which was good, since I pay my chiropractor enough as it is.
 You go girl.
Squish some extra snow into the nooks and crannies to keep the second ball in place. You don't want his torso to fall off. Give him some more proper contouring.
 The last round will be the head, so make this a bit smaller than the second round.
  Place this atop the first two and pack it in tightly around the seams, smoothing and shaping as you go. Give a good walk around your man, and smack him into shape as you wish. This is a good rule for any man, but I digress.
  Now you get to accesorize! You can use branches off a partially dead tree (ask an adult if it's okay first, you don't want to change the landscaping here, kids) for arms. These are a mom and son duo that we made in Grandma and Grandpa's yard last year. If you have carrots and pine cones, these come in very handy for mouth and nose, and we borrowed a few Christmas lights for the eyes.
 Grab your grandpa's extra hat and give up your gloves. For the eyes we used snack sized candy bars that Grandma had packed for us. Then Savanna used some Diet Coke to add the mouth. I'm still not sure how she got the candy bars and Diet Coke away from me.
 When you are satisfied with your finished man, get someone to take your picture before he melts!
  Now get back in the fish house, girl! I need your help reeling in all the fish!

3 comments:
My favorite post ever!!! I need to print those pics and frame them to hang somewhere all through the winter.
Love the snowman directions! I have a feeling we are in for some serious Snowman Snow in the next couple days! Ya-hoo! :o) Great photos, as always, Hanson Girl. By the way, I would love for you to send me a brochure!
Love this post!!!! Great snowpeople. Can you believe my husband had never built a snowman until 3 years ago. Loser.
Love you,
T.
Post a Comment